My summer pose is Hanumanasana, or monkey pose.
Hanuman, a son of Shiva, is known for his stories of physical strength, perseverance, and devotion.In his most epic tale, (ha-monkey pun) Hanuman leaps tirelessly across oceans and mountains; overcoming obstacles in order to rescue his master’s wife, Sita from the evil clutches of some dude you don’t know named Ravana.
If you want to join me on my hanumanasana quest, I’ve broken down the posture for you below. All you need is a block or folded pillows for support. Make sure you’re nice and warmed up first, especially in the hips and hamstrings. There should be no tweaking of the knees or twinging in the low back at any time however, there may be intense sensation in the legs.
Hanuman is perseverance and devotion–characteristics required for the pose.
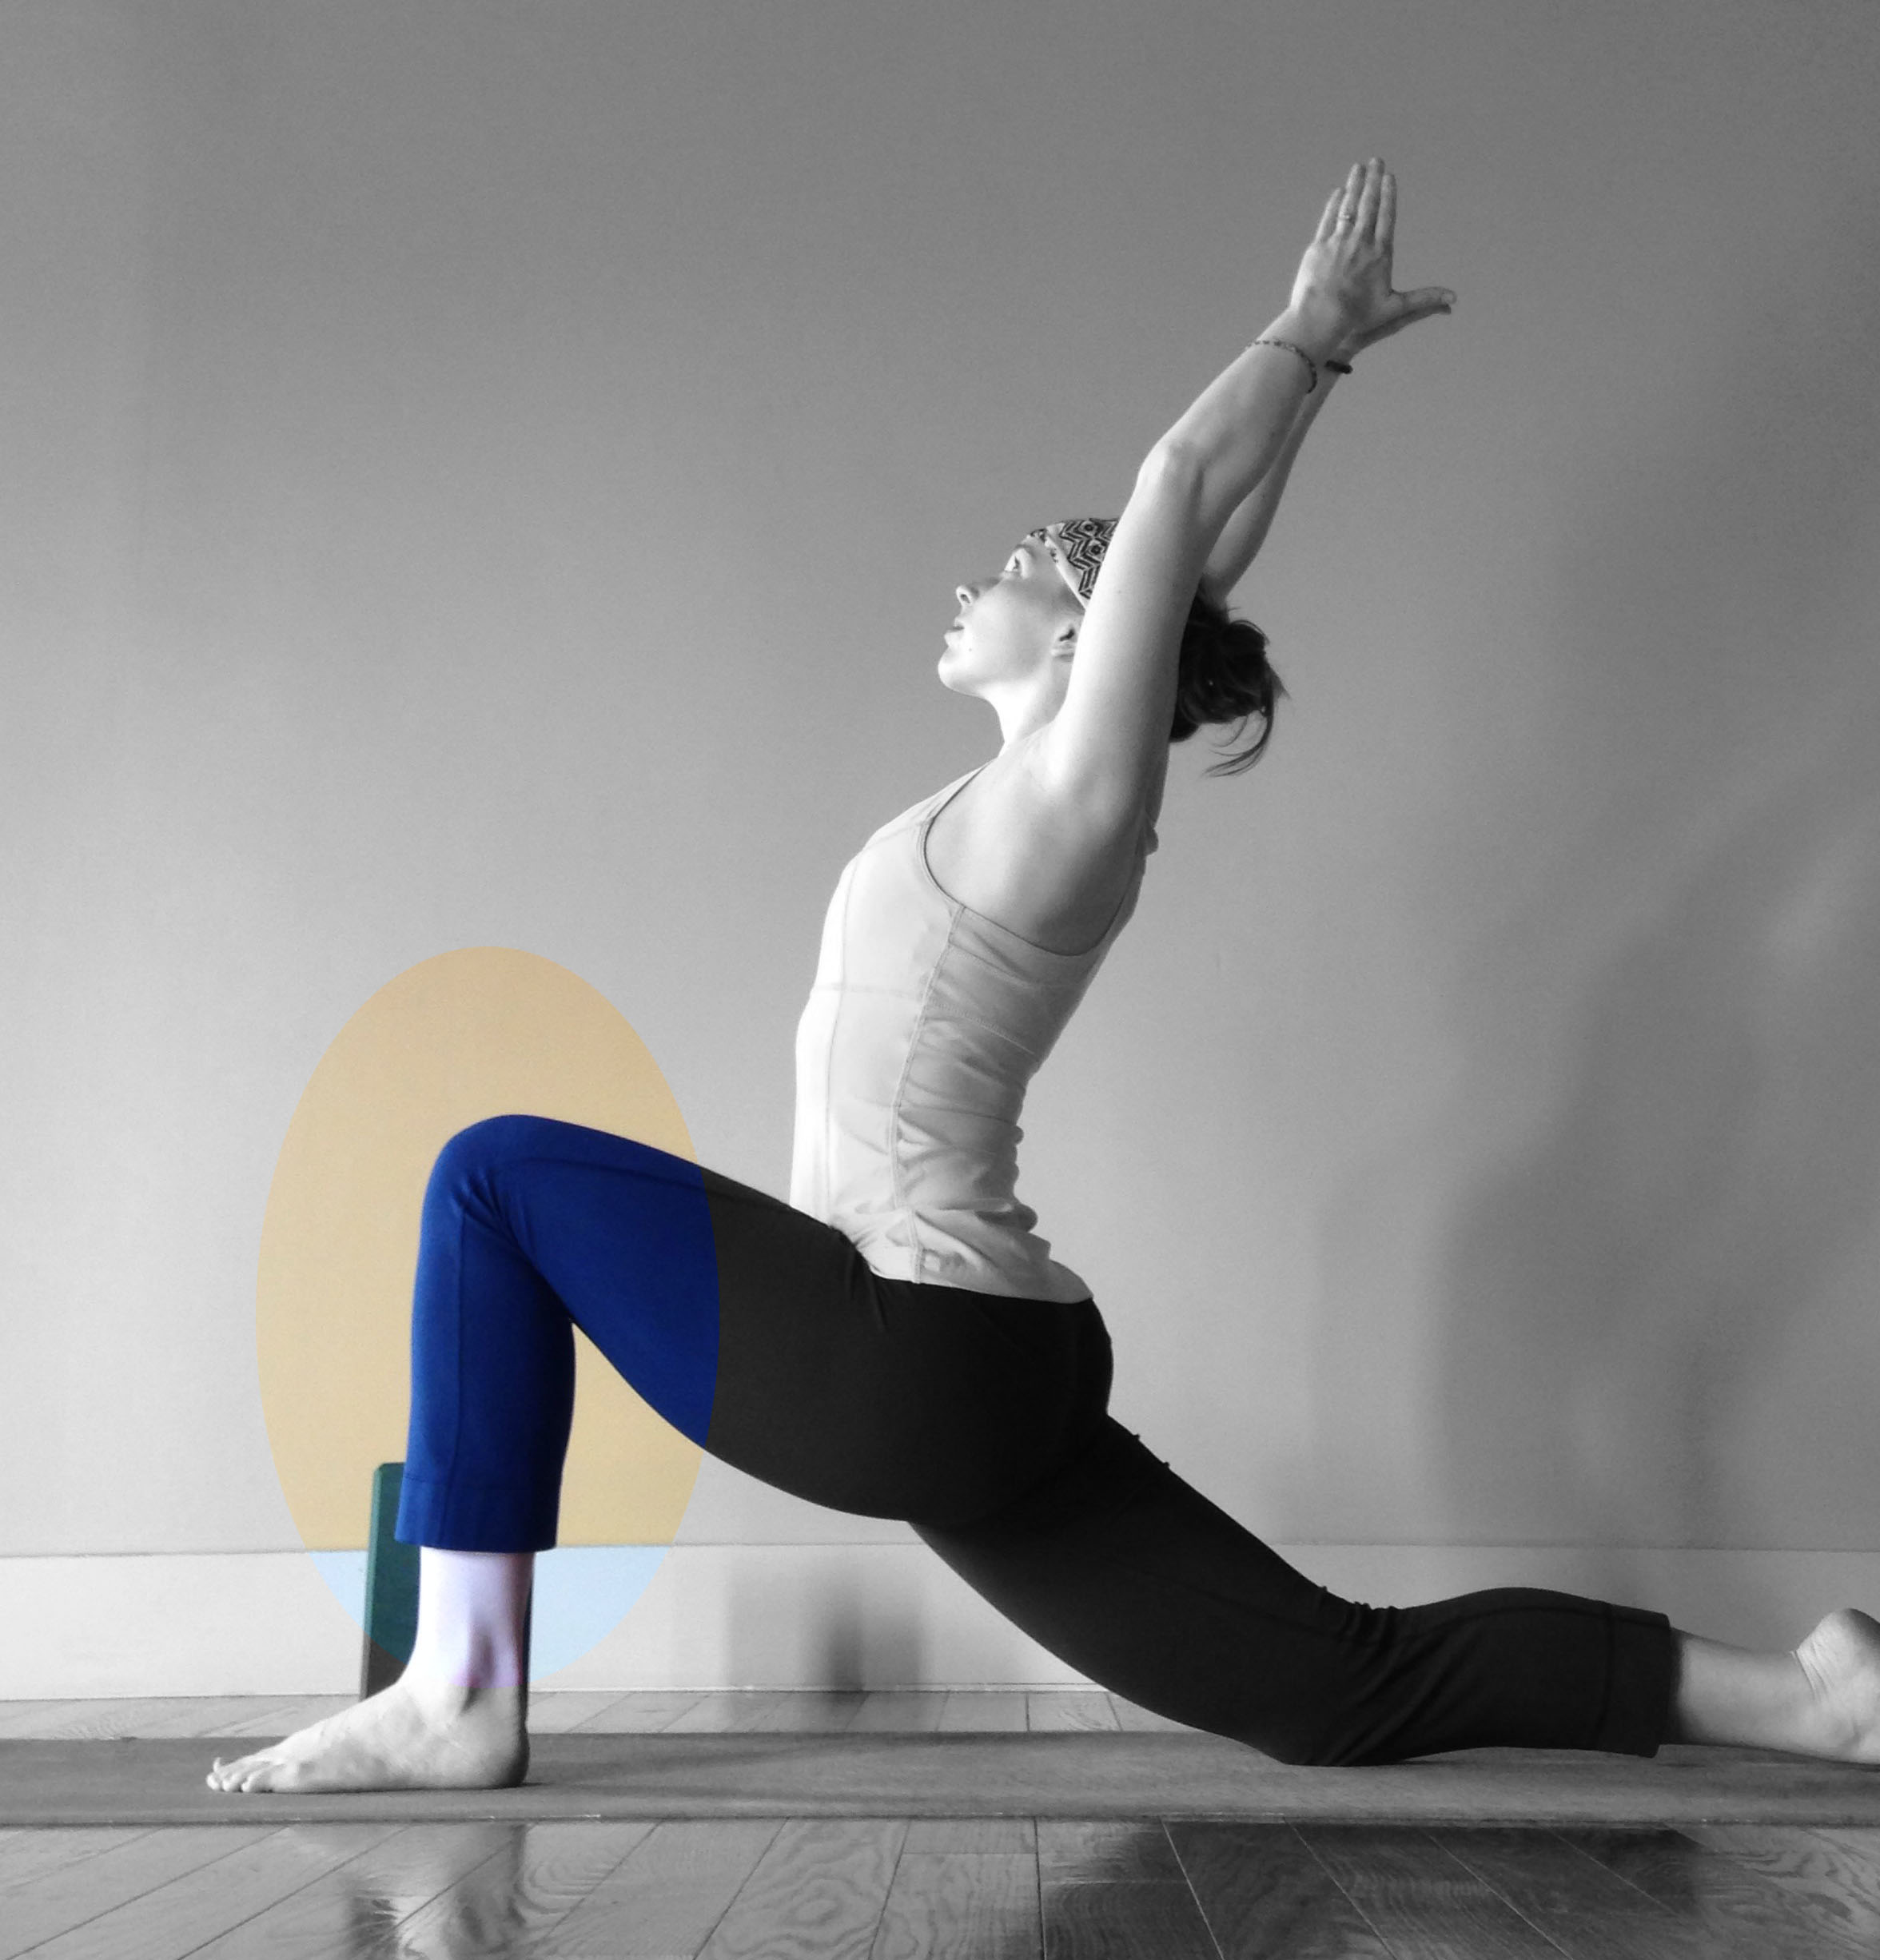
Step 1: Anjaneyasana. Fun Fact: Anjaneya was Hanuman’s name before he was re-christened Hanuman.
The pose can also be referred to as “Knee-down warrior” and is a great hip-opener and warm-up for the pose. Make sure to keep your knee and ankle on the same plane your tailbone tucked to prevent injury.
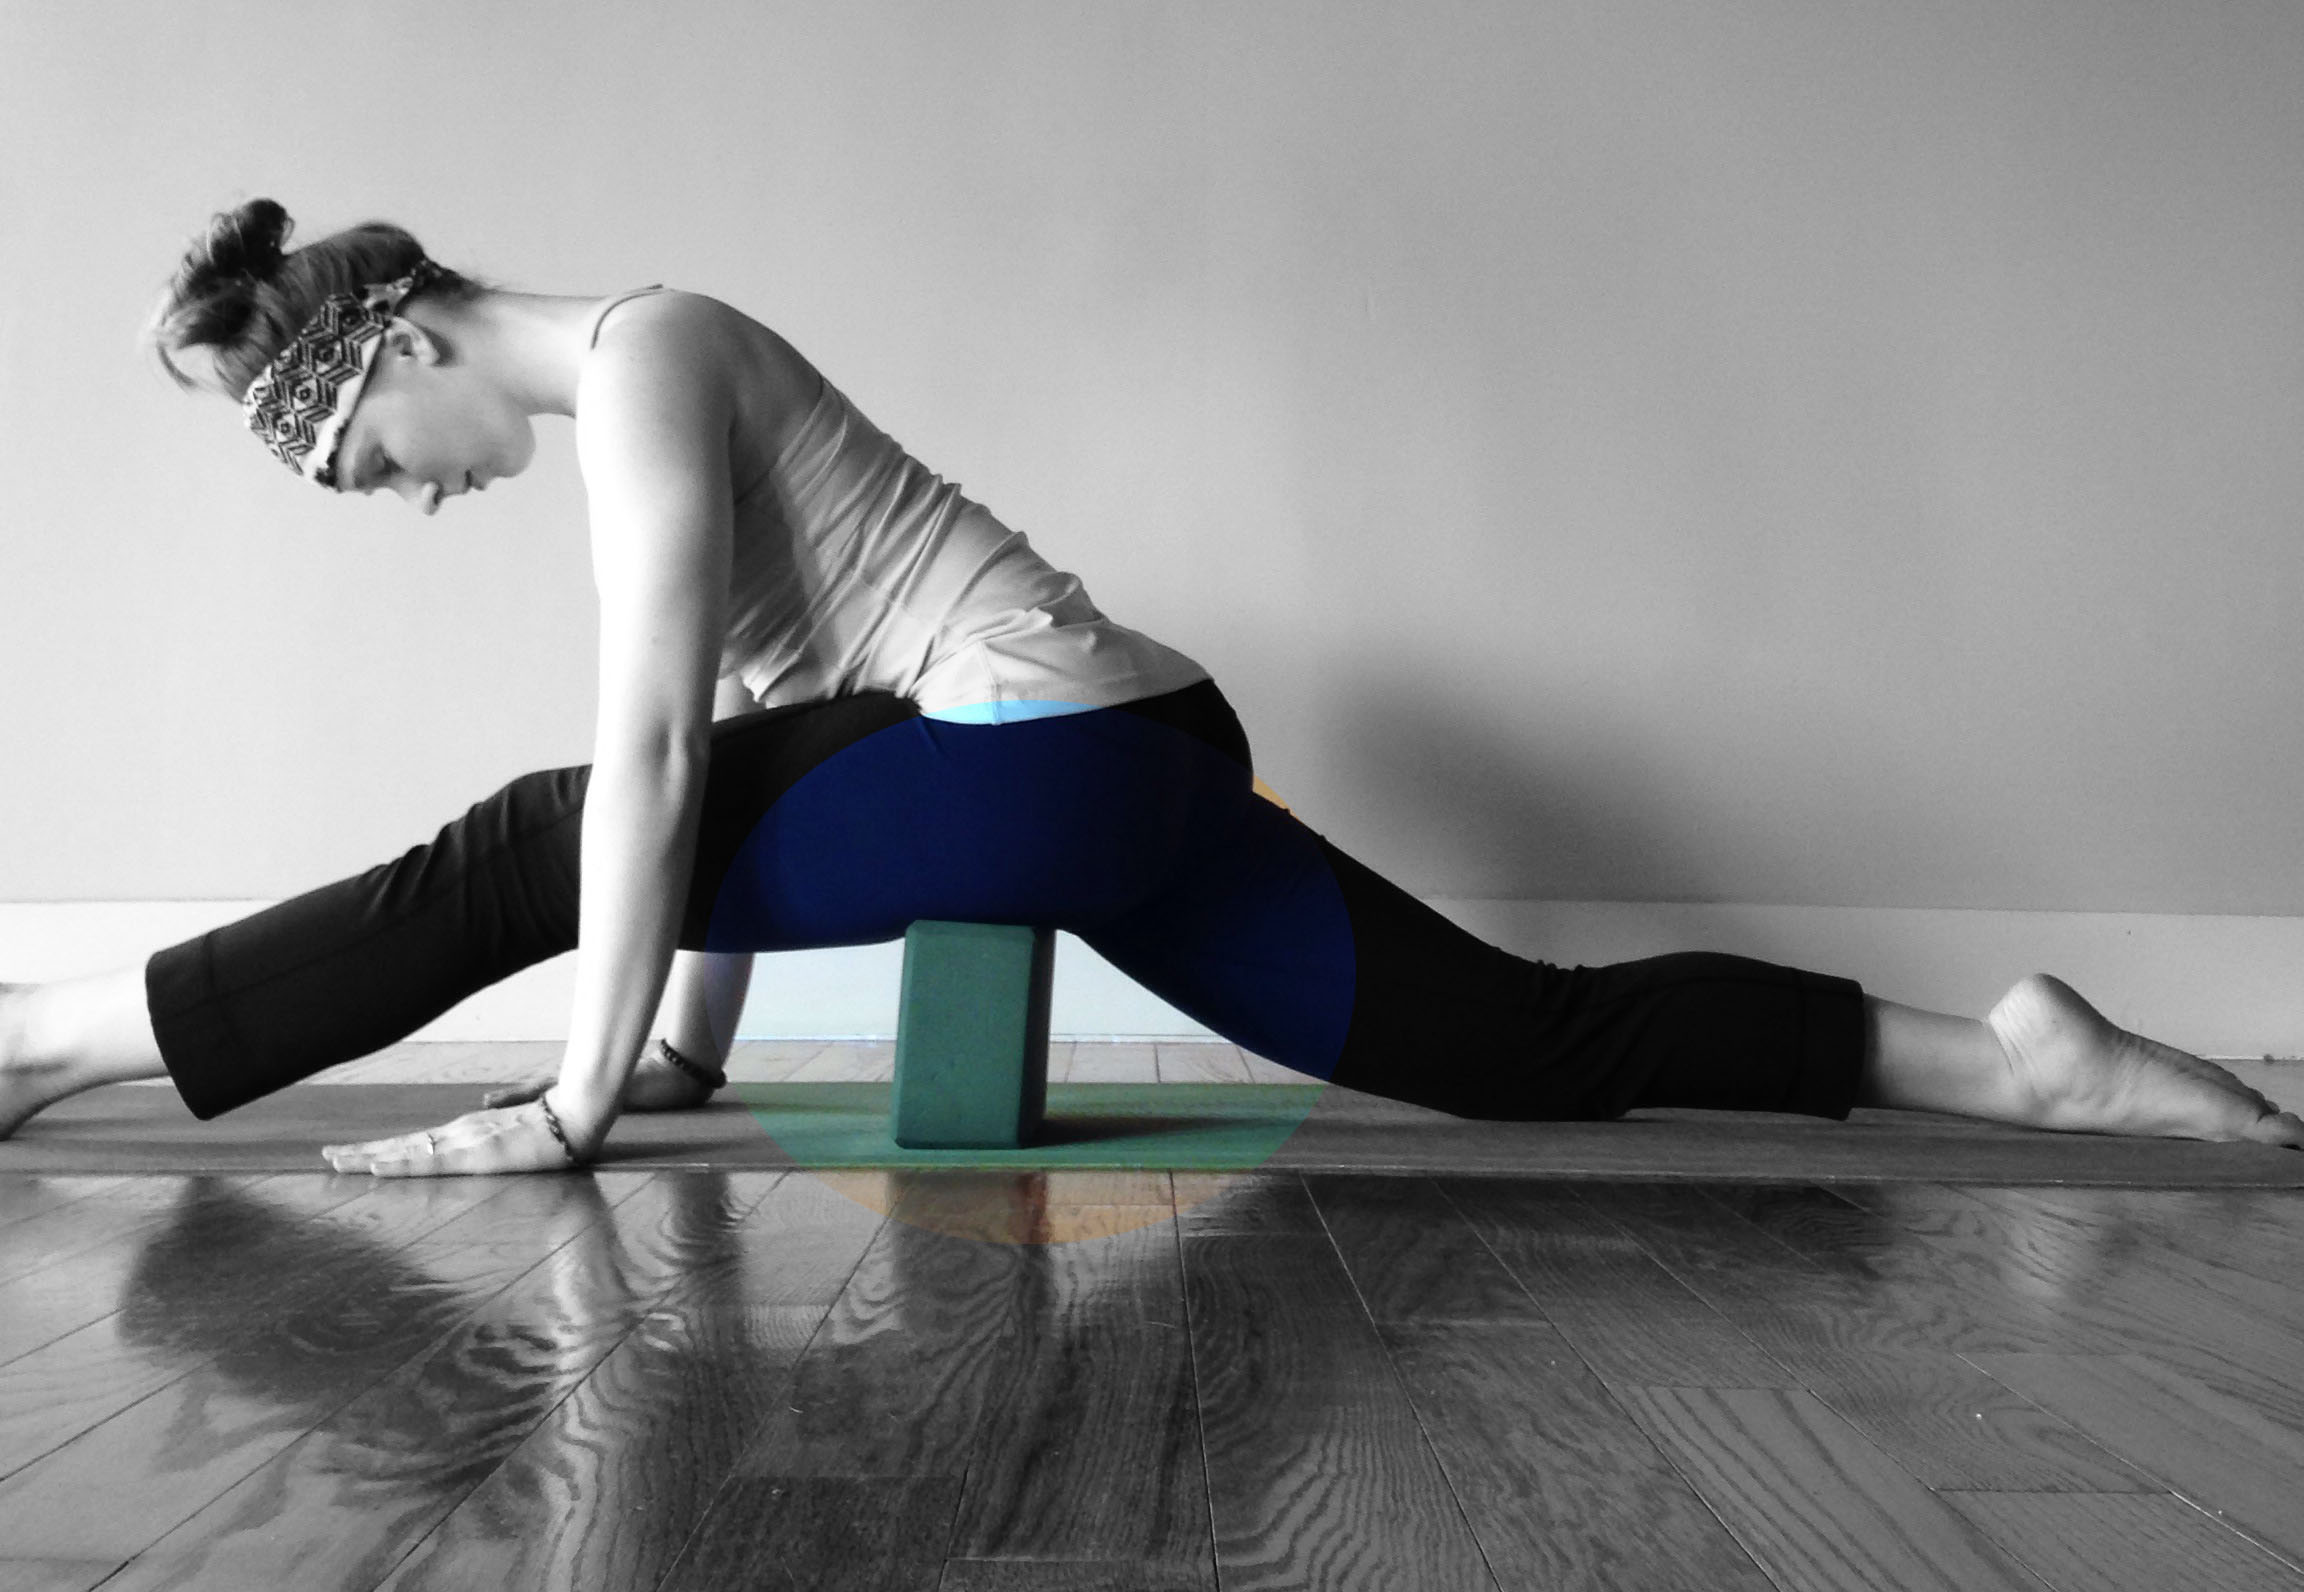
Step 2: Block at Highest Level
Add your block, or other support under the thigh of the front leg a little below the hip joint. The block should feel supporting and comfortable, so play around until you hit the sweet spot. From there, work to extend your front leg by slowly moving the front foot away from your body.

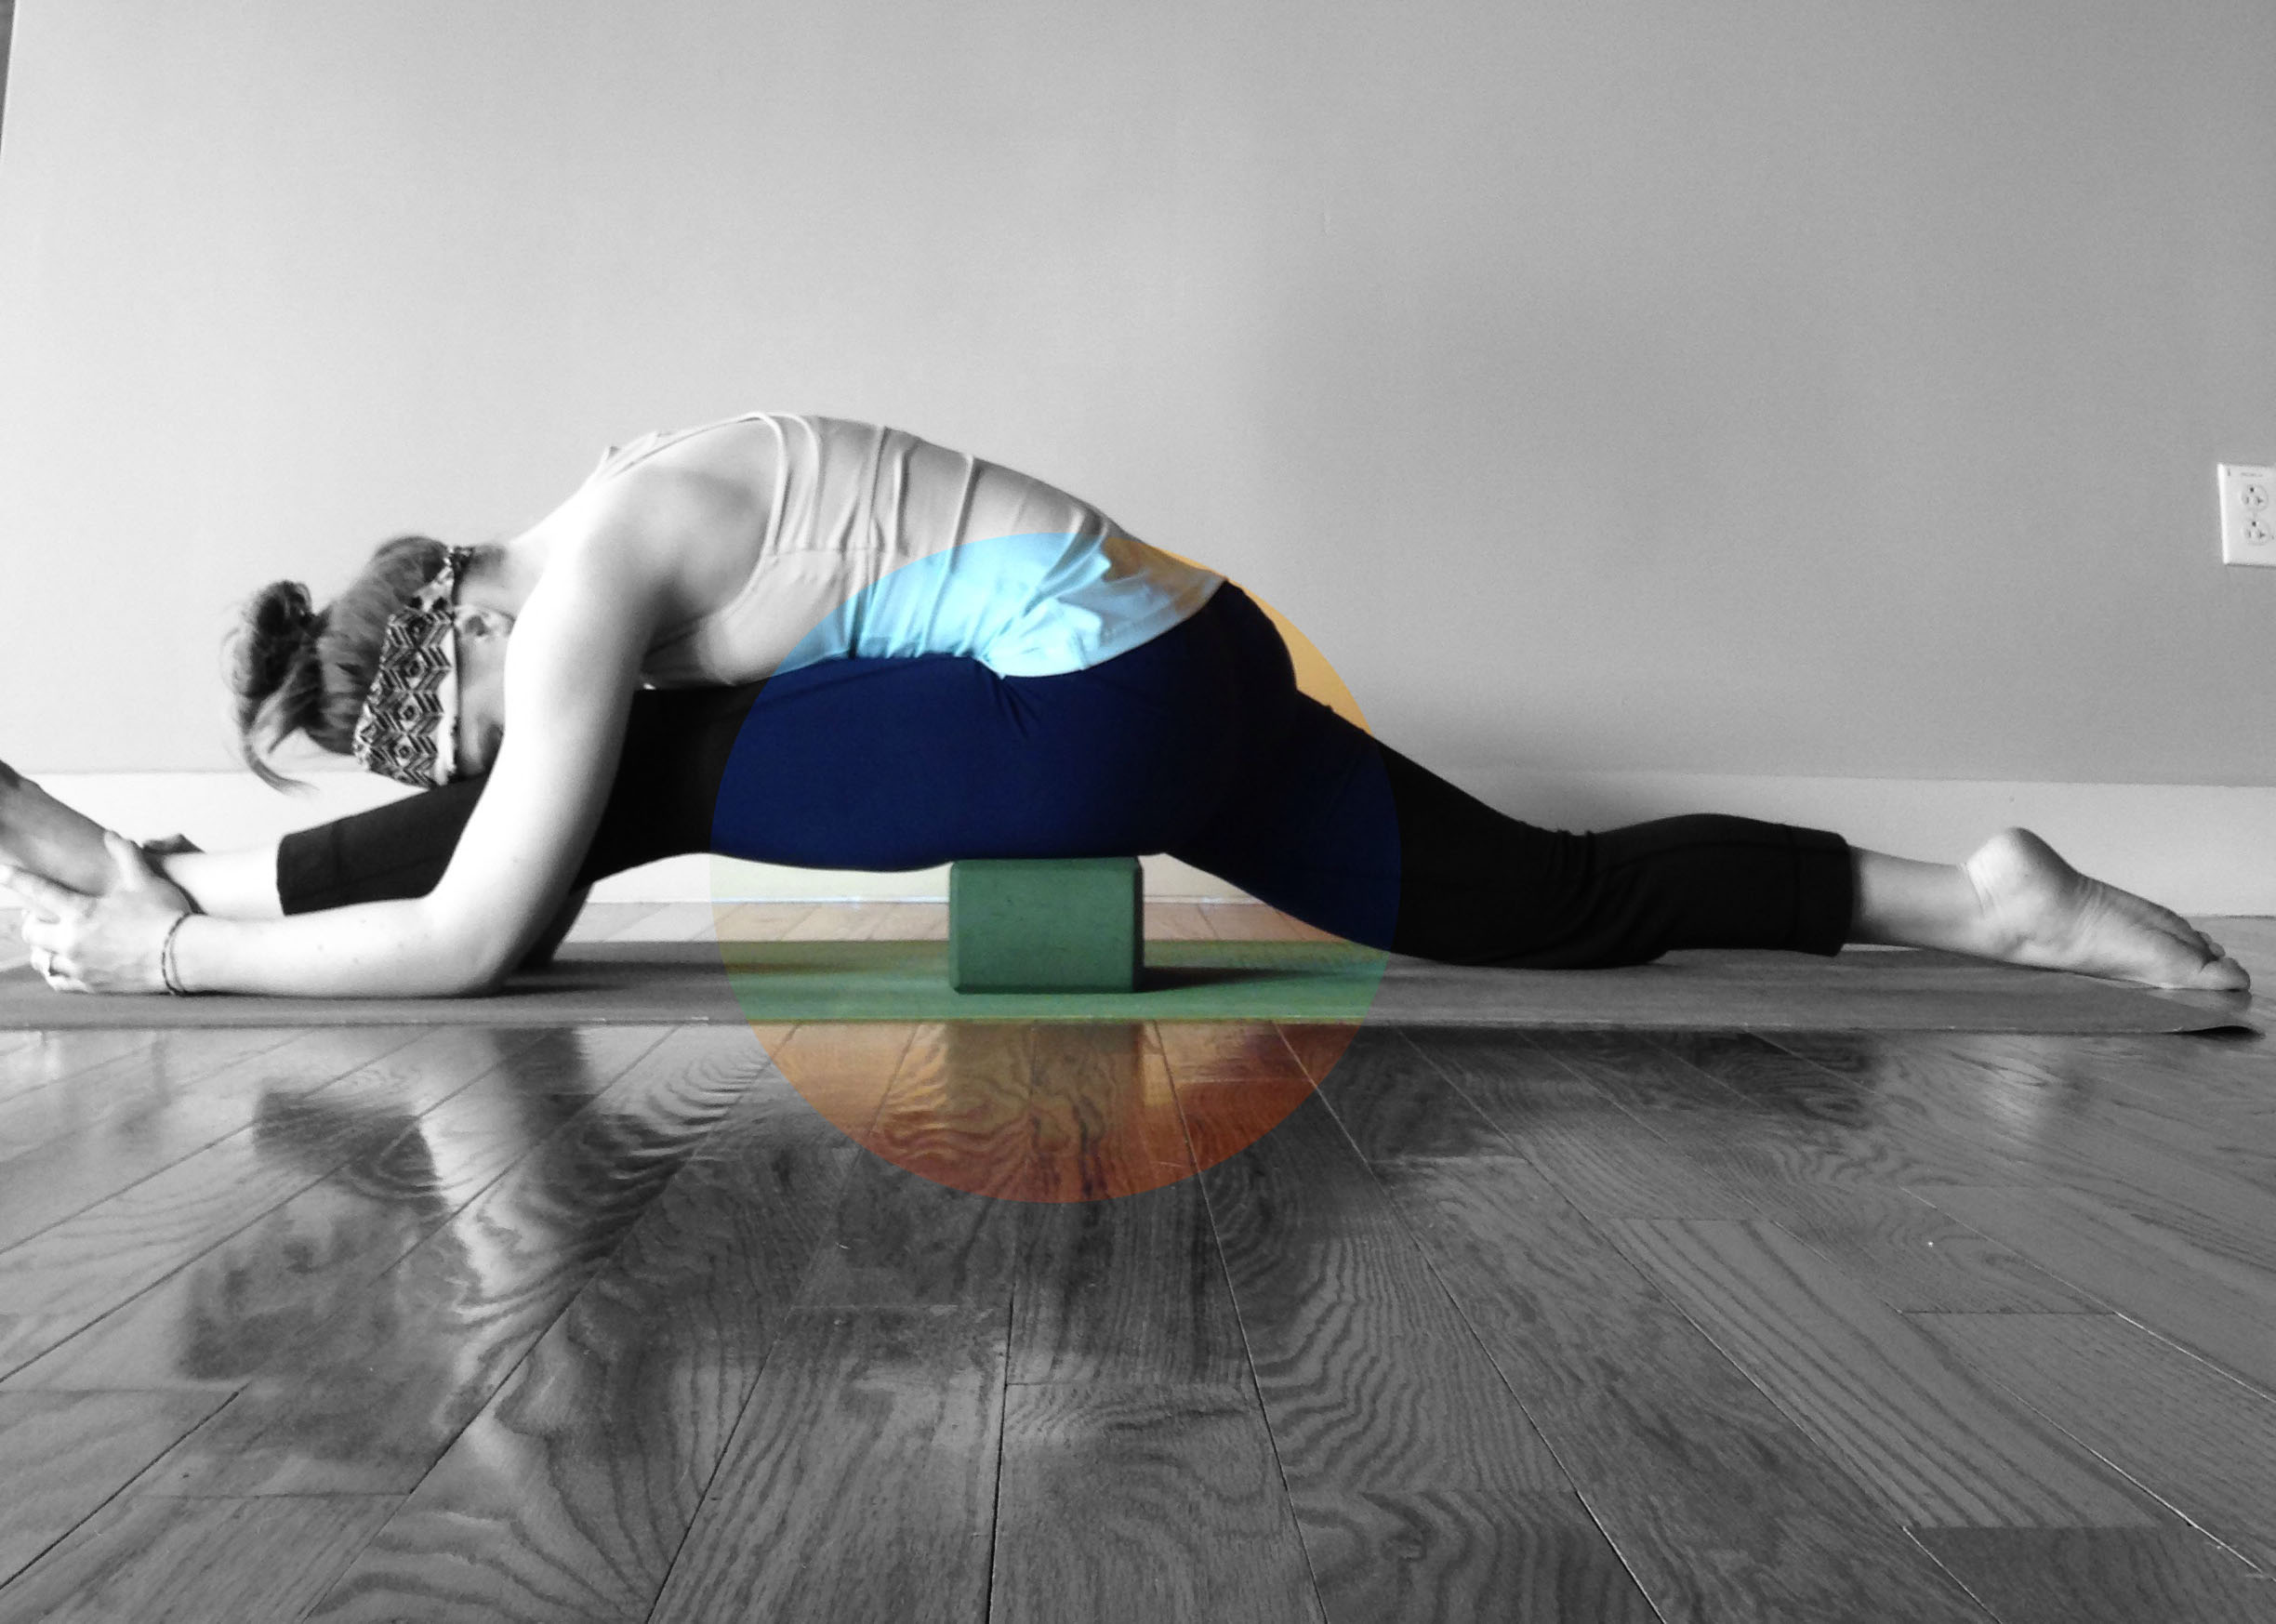
Step 3: Rotate the Block
When you feel comfortable with the block hight, lower the support to its second-lowest level and wiggle out the front leg to your degree. At this point in the process, you may be able to straighten out your back leg a bit more for a nice quad/hip flexor opening. Keep your spine extended to prevent any discomfort in the low back.
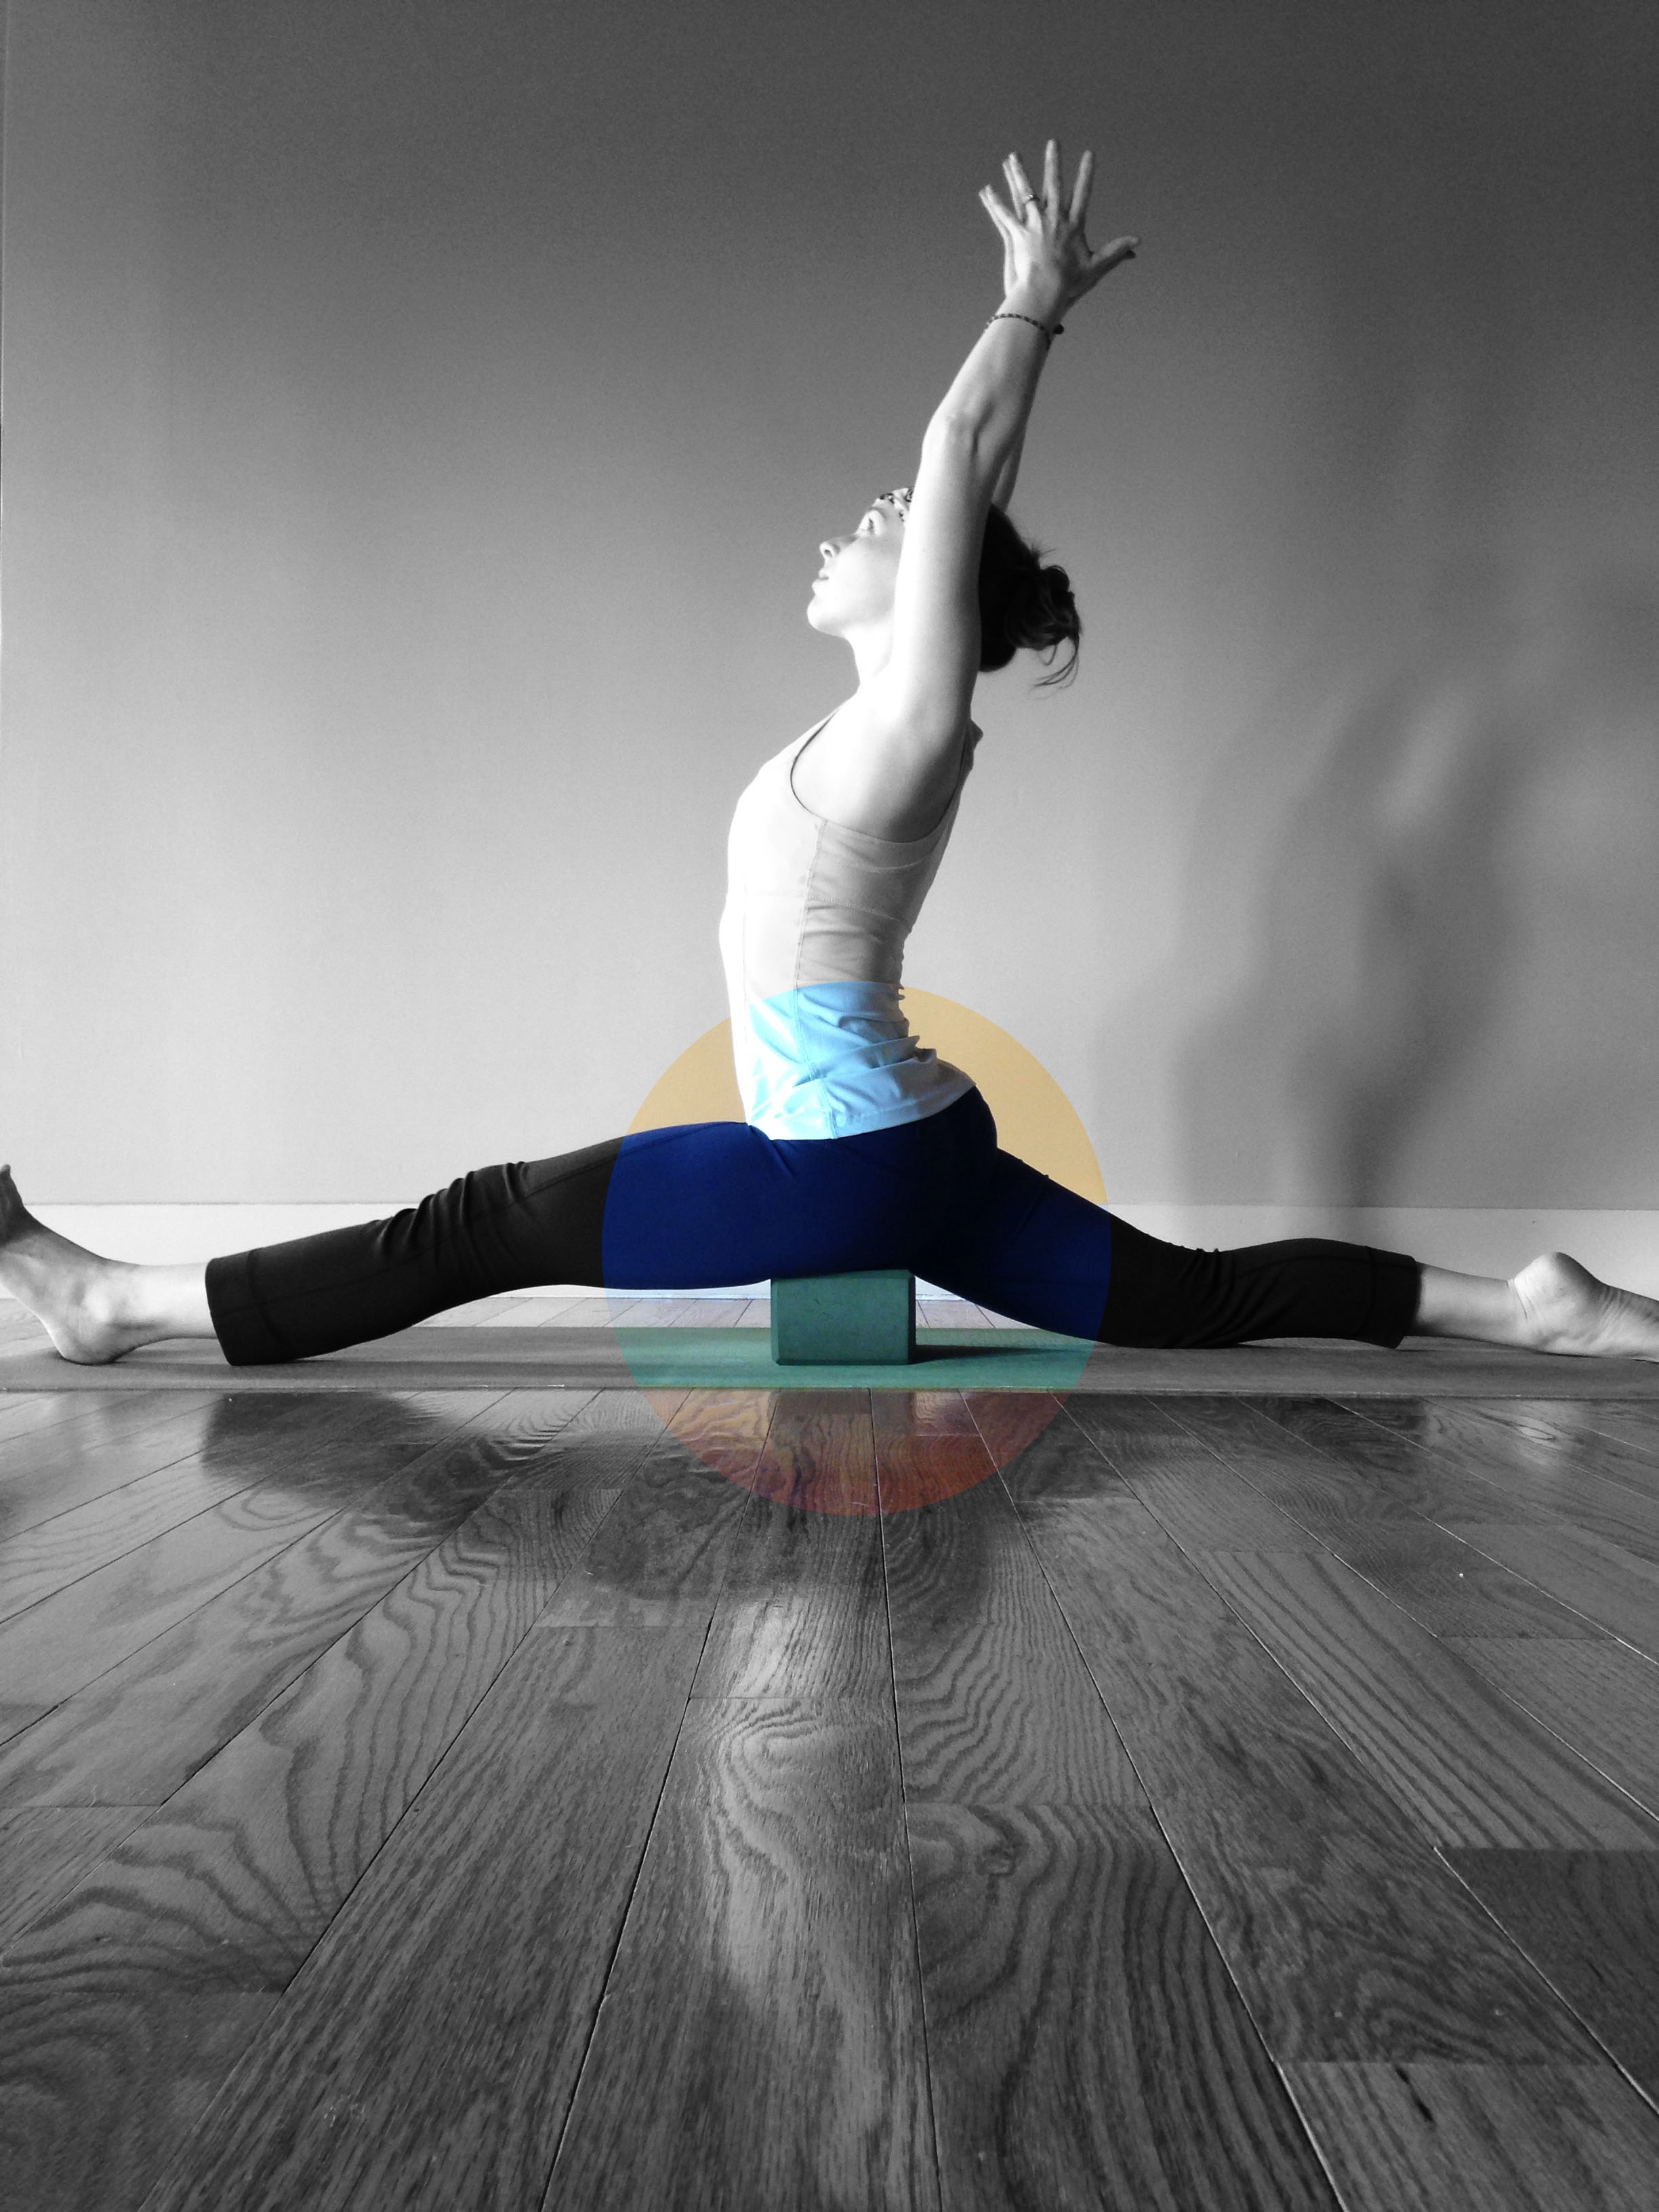
Step 4: Last Block Level!
Continue to rotate the block to the lowest level. When you exceed opening past the block heights, add a blanket or book for the smaller height.
Step 5: Variations
When you feel open at any level, try the posture with your arms lifted both feet flexed, or your back knee bent for additional stretch.
Right now, I’m on Step 5 with my left leg front and Step 4 with my right.
Here’s what I’m loving about the pose. All of my other postures are getting better. Like, way better. Perhaps dangerously so, since I unexpectedly hit my head on the floor in a wide-angled forward fold since I started my practice.
I had a few months where my thought process was a need to perfect basic poses before moving to more advanced postures. That was the perfectionist in me, wanting to do things right the very first time. I now believe that with great body awareness and respect, advanced postures are like getting pulled up into the varsity team to practice. It’s inspiring to learn where you can go, what your body can do.
Come play with me in varsity! We have until the end of August to see where we can go. I want pictures and comments and updates along the way!

Thanks for the step by step, Brynne! Hanumanasana is one of my favorites—I’m not that flexible yet, but getting there!
LikeLike
We can work on it together whenever you get back! You’ve been gone for what feels like years, lady!
LikeLike